
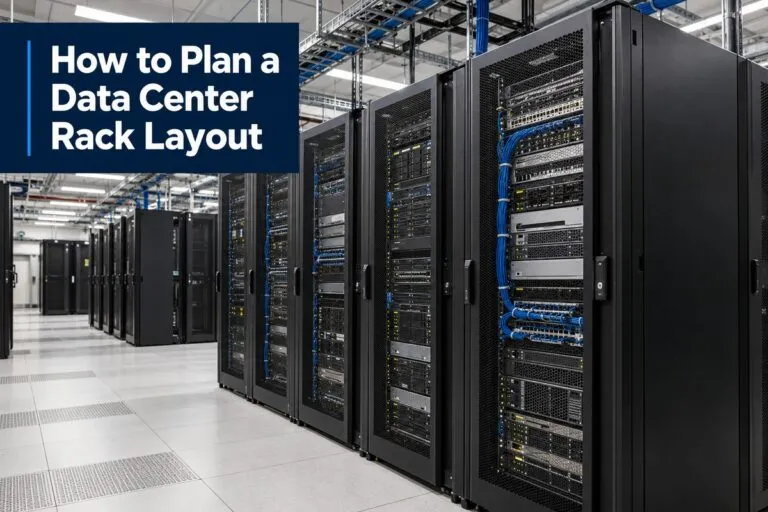
Planning a data center rack layout starts with matching equipment placement to power capacity, cooling, cabling, weight, and maintenance access. A rack can have open mounting space and still lack the electrical or cooling capacity needed for another server.
For IT managers and facilities leaders, the goal is a layout that technicians can install accurately, maintain efficiently, and expand without unnecessary disruption. That requires coordinating the room floor plan, individual rack elevations, and infrastructure connections before equipment arrives.
Build an Equipment Inventory Before Assigning Rack Space
Start with a verified equipment list. Use exact hardware models and configurations, since servers with similar dimensions can have different power, cooling, and mounting requirements.
Record the following information for each device:
- Equipment name, model, quantity, and asset identifier
- Rack height in U, chassis depth, and installed weight
- Rail kit, mounting hardware, and supported mounting depth
- Expected operating power and manufacturer sizing data
- Power supply quantity, voltage, and connector requirements
- Air intake and exhaust direction
- Network connections, optics, and cable types
- Access requirements for replaceable components
Include patch panels, cable managers, shelves, rack-mounted UPS units, and other supporting hardware. These items consume space and affect installation sequencing.
Separate Initial Equipment From Planned Additions
Create separate entries for equipment being installed now and approved expansion. Assign reserved rack positions to specific additions where possible.
For example, if a storage expansion requires 4U, reserve a contiguous 4U block. Four isolated 1U openings will not accommodate it. Reserve the associated power, cooling, and connectivity capacity as well.
Confirm Rack Dimensions and Physical Compatibility
Rack height alone does not establish whether equipment will fit. Check usable depth, rail adjustment ranges, mounting-hole compatibility, and clearance behind the chassis.
One rack unit equals 1.75 inches, or 44.45 millimeters. A 42U rack therefore provides 73.5 inches of vertical mounting space, excluding the cabinet structure. ASHRAE identifies 42U as a common rack height.
Check the Entire Installed Depth
A server may fit between the mounting rails while its cables prevent the rear door from closing. Review the combined space required by:
- Chassis and rail assemblies
- Power plugs and network connectors
- Cable management arms
- Fiber bend radii
- Rear-mounted power distribution units
- Door clearance and component removal paths
A vertical zero-U PDU preserves mounting units, but it still occupies physical space. Confirm that it does not obstruct power supply replacement or interfere with sliding rails.
Also verify the delivery route. Doorways, elevators, ramps, and turning areas must accommodate the cabinet and equipment handling tools.
Position Racks Around Airflow and Service Access
Develop the room layout before finalizing individual rack elevations. Mark rack footprints, cooling equipment, columns, cable pathways, doors, and electrical infrastructure.
For conventional front-to-back air-cooled equipment, arrange rack fronts toward a cold aisle and rack rears toward a hot aisle. This supports separation of supply air and equipment exhaust. ASHRAE discusses this arrangement in its data center design guidance.
Allow Enough Room to Perform Maintenance
Plan aisle dimensions around actual service activities. Technicians need room to open doors, extend servers on rails, operate lifting equipment, and remove failed components.
Confirm clearances with facilities personnel, equipment documentation, and applicable site requirements. A layout that permits someone to walk behind a rack may still leave insufficient space to replace a deep chassis.
Before approving placement, check that:
- Cabinet doors can open to their required service positions.
- Extended equipment does not block essential access.
- Cable trays remain accessible.
- Floor loading supports the installed configuration.
- Leveling, anchoring, and stabilization requirements are addressed.
Create a Rack Elevation With Exact Equipment Positions
Build front and rear rack elevations showing every device and its assigned U range. Use the cabinet’s actual numbering scheme and show orientation clearly.
Place heavier equipment low in the rack where the manufacturer permits it. Dell’s rack installation guidance instructs installers to load partially populated racks from the bottom upward, with the heaviest component at the bottom.
Keep frequently accessed connections reachable, and arrange equipment so replacing one component does not require disturbing unrelated systems.
Example 42U Rack Layout
The following example illustrates space allocation for a mixed server and storage rack. It assumes U1 is at the bottom and that centralized UPS infrastructure supplies the rack.
| Rack position | Equipment or allocation | Space |
|---|---|---|
| U41–U42 | Patch panels | 2U |
| U39–U40 | Horizontal cable management | 2U |
| U37–U38 | Two 1U network switches | 2U |
| U29–U36 | Reserved expansion with blanking panels | 8U |
| U9–U28 | Ten 2U servers | 20U |
| U1–U8 | Two 4U storage systems | 8U |
| Rear vertical channels | A and B zero-U PDUs | 0U |
This example uses all 42U, including 8U reserved for expansion. It is a starting point, not a universal installation template. Actual equipment weights, airflow directions, cable entry points, and service requirements determine the final arrangement.
Calculate Rack Power Before Filling Available Space
Assign a power budget to each rack before approving equipment placement. Use manufacturer configuration tools, measured consumption from comparable systems, and expected workload conditions.
Avoid treating the combined ratings of redundant power supplies as normal equipment demand. Two 1,200-watt power supplies do not automatically mean a server continuously consumes 2,400 watts.
Build a Device-Level Power Budget
The example below uses assumed planning values, not manufacturer specifications.
| Equipment | Quantity | Assumed planning load per device | Total |
|---|---|---|---|
| Servers | 10 | 450 W | 4,500 W |
| Storage systems | 2 | 800 W | 1,600 W |
| Network switches | 2 | 200 W | 400 W |
| Total planned equipment load | 6,500 W |
This produces a 6.5 kW planning load before expansion. Validate the assumptions against the actual configurations and anticipated operating peaks.
Check the complete power path, including upstream capacity, rack PDUs, individual outlet banks, plugs, and equipment cords. For three-phase distribution, review phase loading rather than relying only on total rack kilowatts.
Verify Capacity During a Power-Path Failure
For an A/B design intended to maintain the full rack load after losing either feed, each remaining path must support that load within its permitted operating limits.
In a simplified 6.5 kW example with equal load sharing, each feed normally carries approximately 3.25 kW. If one feed fails, the surviving path must carry approximately 6.5 kW. Actual sharing depends on equipment power supply behavior.
Map each power supply to its PDU and upstream source. Two PDUs connected to the same upstream source do not provide independent power paths. Document how single-corded devices will meet the availability requirement.
Match Equipment Placement to Cooling Capacity
Evaluate cooling at the rack level. A room may have sufficient total cooling capacity while a concentrated equipment cluster develops hot spots.
For air-cooled equipment in classes A1 through A4, ASHRAE lists a recommended inlet temperature range of 18°C to 27°C, or 64.4°F to 80.6°F. Apply the guidance appropriate to the equipment class and manufacturer requirements. The relevant measurement is at the equipment inlet, not simply the room thermostat.
Control Air Bypass and Exhaust Recirculation
Include airflow details directly in the rack plan:
- Install blanking panels in unused front mounting positions.
- Address openings that allow exhaust air to return to equipment intakes.
- Keep cable bundles clear of fan outlets.
- Verify airflow direction for switches and other network appliances.
- Position inlet temperature sensors at multiple rack heights.
Do not add empty U spaces between every server as a default cooling strategy. Follow the hardware installation requirements and cover unused openings appropriately.
For liquid-cooled equipment, include manifold placement, hose routing, connection access, and leak detection requirements in the layout.
Design Cable Routes Before Installation
Choose network switch and patch-panel locations alongside the cabling design. Top-of-rack switching can keep server connections within the cabinet, while end-of-row arrangements shift more connections into shared pathways.
Compare cable quantities, permitted connection lengths, switch port capacity, and maintenance access before selecting the arrangement.
Make Every Connection Traceable
Create a cable schedule that identifies:
- Source device and port
- Destination device and port
- Cable type and length
- Copper category or fiber specification
- Patch-panel position
- Approved routing path
- Label identifier
Use managed pathways for power and data, following equipment and site requirements. Where resilience requires diverse network paths, document their physical routes so both connections do not accidentally share the same vulnerable pathway.
Allow enough slack for servicing while keeping excess cable out of airflow paths. Follow manufacturer bend-radius and retention requirements, particularly for fiber and high-speed interconnects.
Reserve Capacity Across All Rack Constraints
Empty rack units represent only one part of expansion capacity. Track available power, cooling, weight allowance, ports, outlets, and cable pathway space together.
A rack with 10U available may be unable to accept another server if its power path is already at the approved limit.
Use a capacity record that shows installed demand, committed additions, and remaining capacity. This makes expansion decisions more reliable and helps prevent equipment purchases that trigger unplanned infrastructure work.
Validate the Layout Before Rack and Stack Begins
Review the design with IT infrastructure, network, facilities, and installation teams. Resolve discrepancies before shipping equipment or scheduling the installation window.
The deployment package should include:
- Approved room plan and rack identifiers
- Front and rear rack elevations
- Equipment list and mounting hardware requirements
- Power connection schedule
- Cable schedule and labeling standard
- Installation sequence and handling requirements
- Acceptance checks and escalation contacts
For an occupied rack, also document affected services, approved outage windows, and rollback steps before relocating existing equipment.
Verify the Installed Rack Against the Plan
After installation, confirm device positions, power connections, cable labels, airflow, and service access. Record PDU loads and inlet temperatures under a representative workload.
Where authorized, validate the intended power redundancy using an approved test procedure. Update the rack elevations and cable records to reflect the completed installation, and capture clear front and rear photographs.
A well-planned data center rack layout gives installation teams precise instructions and gives operations teams dependable records. The result is equipment that fits, receives adequate power and cooling, and remains accessible throughout its service life.
DeployNation’s Rack & Stack Services support physical equipment installation for IT teams and data center projects. With approved rack elevations, equipment lists, and cabling requirements in place, your team can coordinate on-site deployment around a clear, reviewable plan.